NUTRITION BUSINESS RESOURCES
resources for setting up a website or online nutrition business
OK, weirdly the questions I get asked the most are not about nutrition at all but are about my website and photography. Who built it? (me!) Do I take my own photos (yes!) etc. Basically questions about my nutrition business resources!
I love empowering more nutrition professionals to carve out their space online to provide balance and help to drown out all of the diet crap that is out there. So, here are the tools, resources and software I use daily in my online business.
This page does contain some affiliate links (denoted with a *). This just means if you click on the link and purchase the item, I may receive an affiliate commission. This doesn’t come at an extra cost to you but does help to support the operation of feel good eating™. Of course, take my recommendations as just part of your due diligence like you would when investigating and shopping for anything 🙂
starting a website
Starting a website doesn’t require much effort or investment. A host, domain name and a web design are all that’s really needed.
 Website Hosting: Your website needs somewhere to live and that is what a web host does for you. I recently moved to Siteground* after hearing such great reviews and I have to say the setup and configuration took literally less than 5 minutes. And their support has been super speedy. I wish I had have made the move sooner. You can purchase a domain name (i.e. the www.) from SiteGround* too.
 Website Platform: Once you have somewhere for your website to live, you need to choose your platform. I know some people find WordPress.org tricky to use, but I have not found that in the nearly 10 years I have been using it It’s free, most professional sites use WordPress.org and unlike some other ‘easier’ platforms, you will own your website and have full control of it forever. TIP: if you choose a host like SiteGround* above, you don’t even really need to worry about how to set this up. You just choose WordPress from their setup options and everything will be set up for you with a click of a button. Too easy!

Website Design: Now it is time to make your website come to life and look visually appealing. And for that you need a design or theme. I built this website using the Divi Visual Builder* from Elegant Themes*. I love it because as someone who is NOT a coder, I can quickly bring my website to life by dragging and dropping design elements. If a done-for-you theme is more your style, Elegant Themes* have plenty of those too.
 Divi Booster*: If you are using the Divi Visual Builder then the Divi Booster* is pretty self-explanatory. It gives the functionality of your theme a bit of a boost – or rather, allows you to do some extra configurations with just a tick of a box or click of a button. For example, it allowed me to create the footer on my website in a flash. The plugin creator also provides exceptional customer service even though the plugin is a one-off payment. So, for the $20 odd dollars, I spent on this plugin, I have saved more than 20 hours of time and headaches getting my website looking exactly how I want it.
running a website
Once your website is ready to go live to the world, these are the tools you will need to keep it running.
 Measure what’s working: Hello nutrition nerds! We love tracking and measuring stuff and experimenting to see what makes positive change. So, knowing what’s going on with your website is going to be right up your alley! Google Analytics is a MUST HAVE to keep track of how many people are visiting your site, what pages or posts they are visiting and how they get there. And it is FREE.
 Getting eyes on your website: If it’s not on Google, it doesn’t exist. That is pretty extreme, but in the online world, if your website can’t be found by Google, then you might as well not exist. The Yoast SEO (search engine optimisation) plugin is another must have to guide you through optimising your website to make sure Google can find you and so can the people who would love your services and content. The free version is really all you need unless you are super techy.
 Beautiful looking recipes: Trying to follow a recipe that has no formatting is a nightmare. Make it easier for your readers to have a successful cooking experience with the Tasty Recipe* plugin. It gives you an online form that you just plug the various parts of your recipe into and creates a beautifully formatted recipe for you with the click of a button. They offer a range of ‘recipe cards’ you can choose from depending on the look and feel of your website and these guys also get an 11/10 for their customer service (they contacted Pinterest for me because of an issue I was having!)
 Capturing leads/emails: Thrive Themes* describe their plugins as tools to “…make your entire website convert more of your visitors into subscribers, customers & clients! ” I use Thrive Leads and Thrive Quiz Builder to create attractive forms to capture the names and email addresses of people who are interested in knowing more about feel good eating.™
 Email marketing: Once you have a name and email address, what do you do with it? Well, ConvertKit* is my favourite tool for managing this information and keeping in touch with my readers by email. You can organise the people who subscribe according to what they are interested in so that you can make sure they only get content that is relevant to them, you can send one-off emails
 Your personal editor: If you are like me and your brain and typing fingers don’t always synch up, then Grammarly* is going to be your new best friend. It proof-reads as you type and integrates with Office products (if you are using Windows), social media and your website. I love this tool so much I have invested in the paid premium version. But there is a free version available too.
 Password saviour: Remembering passwords for the myriad of websites, apps, tools I have signed up to…well it just doesn’t happen. I used to hit ‘reset password’ multiple times a day. LastPass* remembers all of your passwords, so you don’t have to.
 Beautiful graphics: When you want next level fonts, graphics, images or website themes, or just something that no one else is using, Creative Market* is where you want to go. They are a one-stop shop for beautiful, classy design assets. Pretty sure there aren’t any ‘woman laughing while eating salad’ stock photos to be found.
Creating graphics: Want to create those cool, colourful graphics for your website or social media? Canva or Easil are my go-to tools. Choose from their seemingly endless supply of pre-designed templates that you can easily modify with your content. They both have free and paid versions – I have found the free versions of both allow me to generally do what I need for my graphics (I jump over to Photoshop for anything more complicated).
 Selling your course: If you have ever done any online learning at Uni, you will know that the online learning platform can make or break your learning experience. Teachable* is a SUPER easy online learning platform to use – both for you as the content creator AND for your students. Store your course content, take payments and display your course sales page all in the one place. There are different subscription plans available, but you can sign up for a free account so that you can have a play around and see how everything works before making a $$ investment.
Thinkific is a popular comparable equivalent.
photography
I like to keep it simple when it comes to my photography. Here’s what I use to achieve my minimalist images.
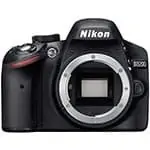
Camera: You heard it here first. I use an el-cheapo entry level camera for my food photography. But it does a great job of taking decent photos. The Nikon d3200* is the exact camera I use right now, but there are stacks on the market – you just need to do your research.
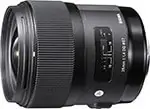 Lens: While I am dropping truth bombs on you, here is another one. It is not the camera that takes great photos, it is the lens. Which is why I chose to invest in the Sigma 35mm 1.4 lens*. It gives me that beautiful depth of field every time.
 Mastering Instagram: Planoly* is actually a social media tool but it is one I use on a daily basis. If you are looking to create a more curated, cohesive Instagram feed, Planoly* is the tool for you. It allows to you drag and drop your images into a faux Instagram grid to see how they look before you publish them. You can also set up your captions and hashtags in advance to streamline your social media marketing.
 Food Photography Workshop: If you want a TRULY immersive food photography experience, I cannot recommend Shellie Froidevaux & Ewen Bell’s 4-day food photography workshops highly enough. Just jump over to the website and check out all the information thee. Seriously do it as this was one of the most fun and educational long weekends I have ever had.
 Master your composition: Composition Essentials* by professional food photographer Rachel Korinek goes beyond the ‘rule of thirds’ and has given me an in-depth understanding along with heaps of visual examples of the science and theory behind composing a visually appealing food photo. This has taken my food photography to the next level.
Bonus content if you sign up using my referral include:
- 10 Additional Mock Magazine Covers
- How To Make Brown Food Your Bestie (video lesson)
- Composition Tips for Shooting in Restaurants (video lesson)
- PNG Cropping Grids for Golden Ratio + Dynamic Symmetry (don’t worry all of this will make sense once you go through the course!)
 Mastering Lightroom: I love Rachel Korinek’s teaching style so much that I have also gone through her Lightroom Magic* course. You don’t have to worry about taking a bad photo in camera ever again after taking this course as almost all can be salvaged in Lightroom, once you know how to use it properly….well that is what I have found after taking this course. In typical Rachel style, it is super detailed, with lots of visual examples and support.
Bonus content if you sign up using my referral include:
- 30 mins of editing Rachel’s favourite work
- Tips for getting your work seen online
- How to get the perfect white balance
- 15 exclusive style + adjustment pre-sets
 Stock images: Don’t have time to take your own food photos or looking for something other than food? Unsplash is the first stock photo site I will Google if I am looking for a stylish image.